The Best Fluffy Pancakes recipe you will fall in love with. Full of tips and tricks to help you make the best pancakes.
Why You’ll Love this Safe Gluten-Free Playdough
Why would you choose gluten-free playdough when regular recipes seem so much easier?
I’ll tell you exactly why this version wins every time. First, it’s safe for kids with celiac disease or gluten sensitivities — no worried glances when little hands inevitably taste-test their creations.
The texture? Actually better than traditional recipes. It stays soft longer and doesn’t crack like store-bought stuff. Plus, you’re using simple ingredients you probably have right now. No emergency grocery runs for mystery additives.
This recipe takes twelve minutes total, and honestly, watching kids play worry-free makes every single minute worth it.
Ingredients for Safe Gluten-Free Playdough
Getting your ingredients together for this gluten-free playdough couldn’t be simpler — most of these pantry staples are probably waiting in your kitchen right now. The beauty of this recipe is that every single ingredient has a purpose, and none of them will send you scrambling to specialty stores or decoding confusing labels.
Ingredients:
- 1 cup (250g) gluten-free flour
- 1/2 cup (125g) salt
- 1 Tablespoon (15g) cream of tartar
- 1 Tablespoon (15g) vegetable oil
- 1 cup (250ml) water
- Food coloring
Now, let’s talk about the gluten-free flour — any basic blend works perfectly here. I reach for whatever’s on sale, honestly. The cream of tartar is your secret weapon for that perfect stretchy texture, so don’t skip it even if you have to hunt for it in the baking aisle. Regular table salt does the job beautifully, and any neutral oil like vegetable or canola keeps things smooth. As for food coloring, liquid drops work great, but gel coloring gives you those gorgeous, vibrant colors without thinning the dough. No stress if you only have one type — both deliver happy, colorful results.
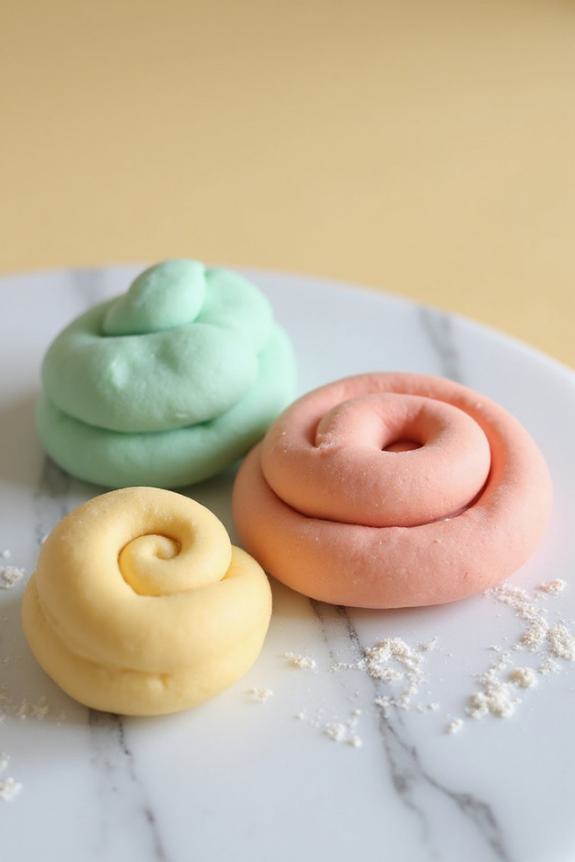
How to Make this Safe Gluten-Free Playdough
Making this gluten-free playdough is honestly one of those satisfying kitchen wins where everything just works.
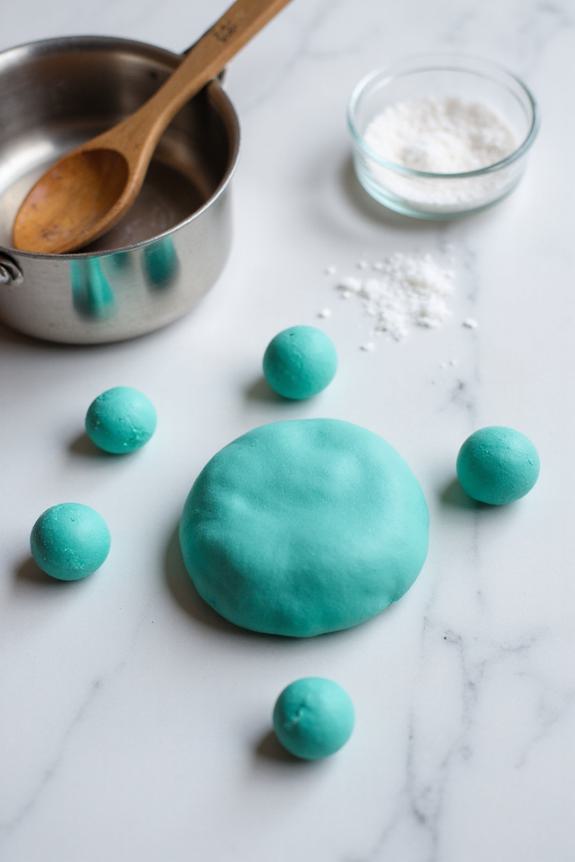
Start by combining your dry ingredients — that’s 1 cup (250g) of gluten-free flour, 1/2 cup (125g) of salt, and 1 tablespoon (15g) of cream of tartar — right in a medium saucepan.
Give them a good stir to distribute everything evenly, then place the pan over medium heat. Here’s where the magic happens: slowly add 1 cup (250ml) of water, 1 tablespoon (15g) of vegetable oil, and your food coloring. I always add the coloring now because it blends so much more evenly than trying to knead it in later.
Keep stirring steadily as the mixture heats up — you’ll watch it transform from a soupy mess into actual dough in about 3-4 minutes.
The dough is ready when it pulls away from the sides of the pan and forms a cohesive ball around your spoon. Don’t panic if it looks a little lumpy at first; that smooths out perfectly once you start kneading.
Let it cool for a few minutes because nobody needs burnt fingertips, then turn it out onto a clean surface and knead until it’s smooth and stretchy.
The whole process takes maybe 12 minutes from start to finish, and you’ll have perfectly pliable playdough that’s completely safe for little hands and mouths. If you enjoy working with gluten-free ingredients, you might also want to explore gluten free bread makers for creating safe baked goods at home.
Substitutions & Variations
The beauty of this gluten-free playdough recipe is how forgiving it’s when you need to work with what’s already sitting in your pantry.
No gluten-free flour? Try rice flour or almond flour — both work beautifully. Out of cream of tartar? Skip it, though your dough won’t last quite as long.
I love experimenting with natural colorings: beet juice for pink, turmeric for sunny yellow, or cocoa powder for chocolate brown.
Want sparkly playdough? Add a good pinch of glitter. Essential oils create amazing scents — lavender’s my favorite.
Each variation brings its own little magic.
What to Serve with Safe Gluten-Free Playdough
Beyond just the playdough itself, I’ve learned that having the right tools and activities makes all the difference in keeping kids engaged and happy.
I always set out cookie cutters, rolling pins, and plastic knives for safe cutting. Textured items work wonders too — think toy cars for tire tracks or forks for interesting patterns.
I love adding small bowls for pretend cooking games and wooden stamps for shape-making. Don’t forget a plastic tablecloth underneath. Trust me on this one.
And here’s my secret weapon: ice cube trays make perfect little molds for tiny creations.
Final Thoughts
After countless batches of this gluten-free playdough, I can honestly say it’s become my go-to recipe for safe, sensory fun.
There’s something magical about watching little hands plunge into homemade dough, knowing it’s completely safe if they sneak a taste. The texture rivals store-bought versions, and honestly, it costs a fraction of the price.
I love that it keeps for weeks in the fridge and never gets that weird, chalky feel. This recipe has saved countless rainy afternoons and given me peace of mind.
Sometimes the simplest solutions really are the best ones.